Nunchaku is an open source inference engine developed by the MIT HAN Lab that focuses on efficiently running 4-bit quantized diffusion models. It uses SVDQuant technology to quantize the weights and activations of a model into 4 bits, significantly reducing memory footprint and inference latency. FLUX and diffusion models such as SANA for tasks such as image generation, editing and conversion. It is compatible with ComfyUI Integration, providing a user-friendly interface, suitable for researchers and developers to run complex models on low-resource devices. The project is open source on GitHub with an active community, providing detailed documentation and sample scripts for users to get started quickly.
Function List
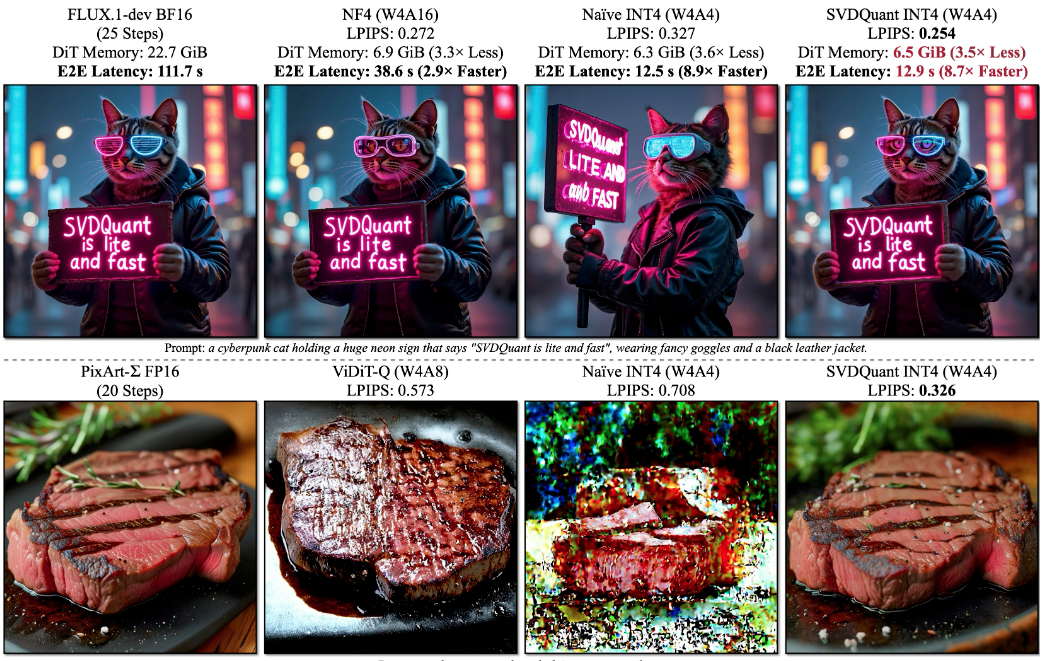
- Supports 4-bit quantized diffusion model inference with 3.6x memory footprint reduction and up to 8.7x speedup.
- Compatible with the FLUX.1 family of models, including FLUX.1-dev, FLUX.1-schnell and FLUX.1-tools.
- Provides a variety of generation tasks such as text-to-image, sketch-to-image, depth map/edge map-to-image, and image restoration.
- Supports LoRA loading, allowing users to load custom models to enhance generation.
- Integration with ComfyUI provides a node-based operator interface that simplifies workflow configuration.
- Supports natural language image editing and text-driven image modification via FLUX.1-Kontext-dev.
- Provides FP16 accuracy support to optimize model performance and generation quality.
- Provides PuLID v0.9.1 integration with support for custom model paths and timestep control.
Using Help
Installation process
Installation of Nunchaku requires ensuring that your system meets basic requirements, including PyTorch, CUDA, and specific compilers. Below are detailed installation steps for both Linux and Windows systems.
environmental preparation
- Installing PyTorch: Make sure PyTorch 2.6 or later is installed. For example, use the following command to install PyTorch 2.6:
pip install torch==2.6 torchvision==0.21 torchaudio==2.6If using Blackwell GPUs (e.g. RTX 50 series), PyTorch 2.7 and CUDA 12.8 or higher are required.
- Checking the CUDA version: Linux requires CUDA 12.2 and above, Windows requires CUDA 12.6 and above.
- Installation of the compiler::
- Linux: Ensure that the installation
gcc/g++11 or higher, which can be installed via Conda:conda install -c conda-forge gcc gxx - Windows: Install the latest version of Visual Studio and make sure that the C++ development component is included.
- Linux: Ensure that the installation
- Installation of dependencies: Install the necessary Python packages:
pip install ninja wheel diffusers transformers accelerate sentencepiece protobuf huggingface_hubIf you need to run the Gradio demo, install it additionally:
pip install peft opencv-python gradio spaces
Install Nunchaku
- Installation from Hugging Face: Choose the appropriate wheel file for your version of Python and PyTorch. For example, Python 3.11 and PyTorch 2.6:
pip install https://huggingface.co/mit-han-lab/nunchaku/resolve/main/nunchaku-0.2.0+torch2.6-cp311-cp311-linux_x86_64.whlAvailable for Windows users:
pip install https://huggingface.co/mit-han-lab/nunchaku/resolve/main/nunchaku-0.1.4+torch2.6-cp312-cp312-win_amd64.whl - Installation from source(Optional):
git clone https://github.com/mit-han-lab/nunchaku.git
cd nunchaku
git submodule init
git submodule update
export NUNCHAKU_INSTALL_MODE=ALL
python setup.py develop
Note: Setting
NUNCHAKU_INSTALL_MODE=ALLEnsure that the generated wheel files are compatible with different GPU architectures.
ComfyUI Integration
- Install ComfyUI: If ComfyUI is not already installed, you can install it with the following command:
git clone https://github.com/comfyanonymous/ComfyUI.git cd ComfyUI pip install -r requirements.txt - Installing the ComfyUI-nunchaku plugin::
pip install comfy-cli
comfy install
comfy node registry-install ComfyUI-nunchaku
Or search and install via ComfyUI's Custom Nodes Manager.
ComfyUI-nunchakuThe - Download model: Download the necessary model files to the specified directory. Example:
huggingface-cli download comfyanonymous/flux_text_encoders clip_l.safetensors --local-dir models/text_encoders huggingface-cli download comfyanonymous/flux_text_encoders t5xxl_fp16.safetensors --local-dir models/text_encoders huggingface-cli download black-forest-labs/FLUX.1-schnell ae.safetensors --local-dir models/vae - Replicating workflows: Copy the sample workflow to the ComfyUI directory:
mkdir -p user/default/example_workflows cp custom_nodes/nunchaku_nodes/example_workflows/* user/default/example_workflows/ - Run ComfyUI::
cd ComfyUI
python main.py
Main Functions
Nunchaku offers a variety of image generation and editing functions, which are described below.
Text-to-Image Generation
- Open ComfyUI and load the Nunchaku workflow (e.g.
nunchaku-flux.1-dev-pulid.json). - Select in the workflow
Nunchaku Text Encoder LoaderSettingsuse_4bit_t5=Trueto save memory by using a 4-bit quantized T5 text encoder. - indicate clearly and with certainty
t5_min_length=512to improve image quality. - Enter textual hints, e.g., "a futuristic city at sunset", and adjust the generation parameters (e.g., number of sampling steps, bootstrap scale).
- Run the workflow to generate the image.
Image editing (FLUX.1-Kontext-dev)
- Load the FLUX.1-Kontext-dev model to enable natural language image editing.
- Upload the image to be edited and enter the editing instructions, such as "add a bright moon in the sky".
- align
start_timestepcap (a poem)end_timestepparameter that controls the intensity and range of editing. - Execute Generate to view the edited image.
Sketch to Image
- In ComfyUI select
Sketch-to-ImageWorkflow. - Upload the sketch image and set the generation parameters.
- Run the workflow to generate a sketch-based image.
LoRA loading
- Download or train a custom LoRA model, save it to the
models/loraCatalog. - In the ComfyUI workflow add
LoRA Loadernode that specifies the LoRA model path. - Run the workflow and apply the enhanced generation effects of LoRA.
caveat
- Ensure GPU architecture compatibility (supports Turing, Ampere, Ada, A100, etc.).
- Check the log output for Python executable paths, especially in ComfyUI Portable.
- If you encounter installation problems, refer to the official documentation
docs/setup_windows.mdOr tutorial videos.
application scenario
- AI Artistic Creation
Artists use Nunchaku to generate high-quality art images. Users enter text descriptions or upload sketches to quickly generate images that match ideas, suitable for conceptual design and artistic exploration. - Research and Development
Researchers used Nunchaku to test 4-bit quantization models on low-resource devices. Its low memory footprint and high inference speed are suitable for academic experiments and model optimization. - Image editing and restoration
Photographers or designers streamline the post-processing process by editing images with natural language commands, such as fixing blemishes or adding elements. - Education and learning
Students and beginners use Nunchaku to learn the inference process of diffusion modeling.ComfyUI's node-based interface is intuitive and easy to understand for teaching and practicing.
QA
- What GPUs does Nunchaku support?
Nunchaku supports NVIDIA GPUs including Turing (RTX 2080), Ampere (RTX 3090, A6000), Ada (RTX 4090), and A100 architectures. Blackwell GPUs require CUDA 12.8 and PyTorch 2.7. - How do I install it on Windows?
Install Visual Studio and CUDA 12.6 or higher, use the Hugging Face Windows wheel file to install directly, or refer to thedocs/setup_windows.mdThe - Does 4-bit quantization affect image quality?
SVDQuant technology maintains visual fidelity by absorbing outliers through low-rank components. On FLUX.1-dev, the image quality of 4-bit quantization approaches that of a 16-bit model. - How to fix ComfyUI installation failure?
Make sure the Python environment is consistent with ComfyUI, and check the path to the Python executable in the log. Check the path to the Python executable in the log using thecomfy-clior manual installationComfyUI-nunchakuThe
Application Examples
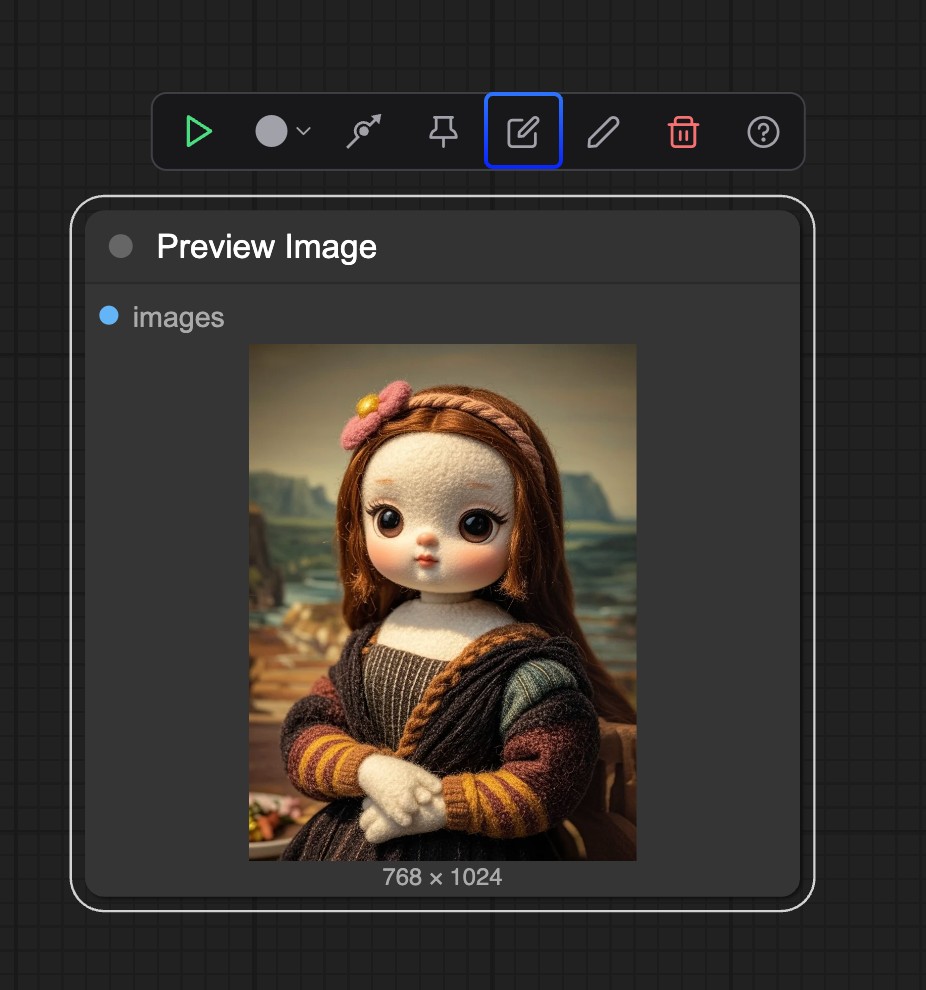
nunchaku-flux.1-kontext-dev AI Raw Graphics One-Click Integration Pack Minimum 4G Graphics Card Runs 30 Seconds to Graphics v20250630
FLUX.1-Kontext-dev Integration Pack


